
Quick start
Introduction
Section titled “Introduction”The aim of this page is to give you a quick understanding on how to use Pithus as a new user. For more details about the interface and features, please refer to the interface reference.
You can follow along with the exercise, or simply read this page and do your own thing on the side.
Starting an analysis
Section titled “Starting an analysis”To start, make your way to the public instance.
On here, you will be presented with the homepage. You have a few options to get started and explore Pithus:
- click the link to the example report: this will lead you to the latest analysed report
- use the search bar to find existing and interesting reports
- upload your own APK if you already have one ready
Using the search bar
Section titled “Using the search bar”For a first experience, you can try a very simple search by typing * in the search bar and validating by pressing Enter or clicking the magnifier icon on the right. This search will match all available samples however, the public instance will limit the results to the 50 latest analysis.
For a more spicy search, you can input vt.malicious:>1 and submit. This query will look for all the samples in the database that have been flagged by VirusTotal as malicious. Once again, limited to the 50 latests reports.
If you want to explore more the capabilities of the search bar, you can read the reference.
Upon submitting your search you will see the following screen:
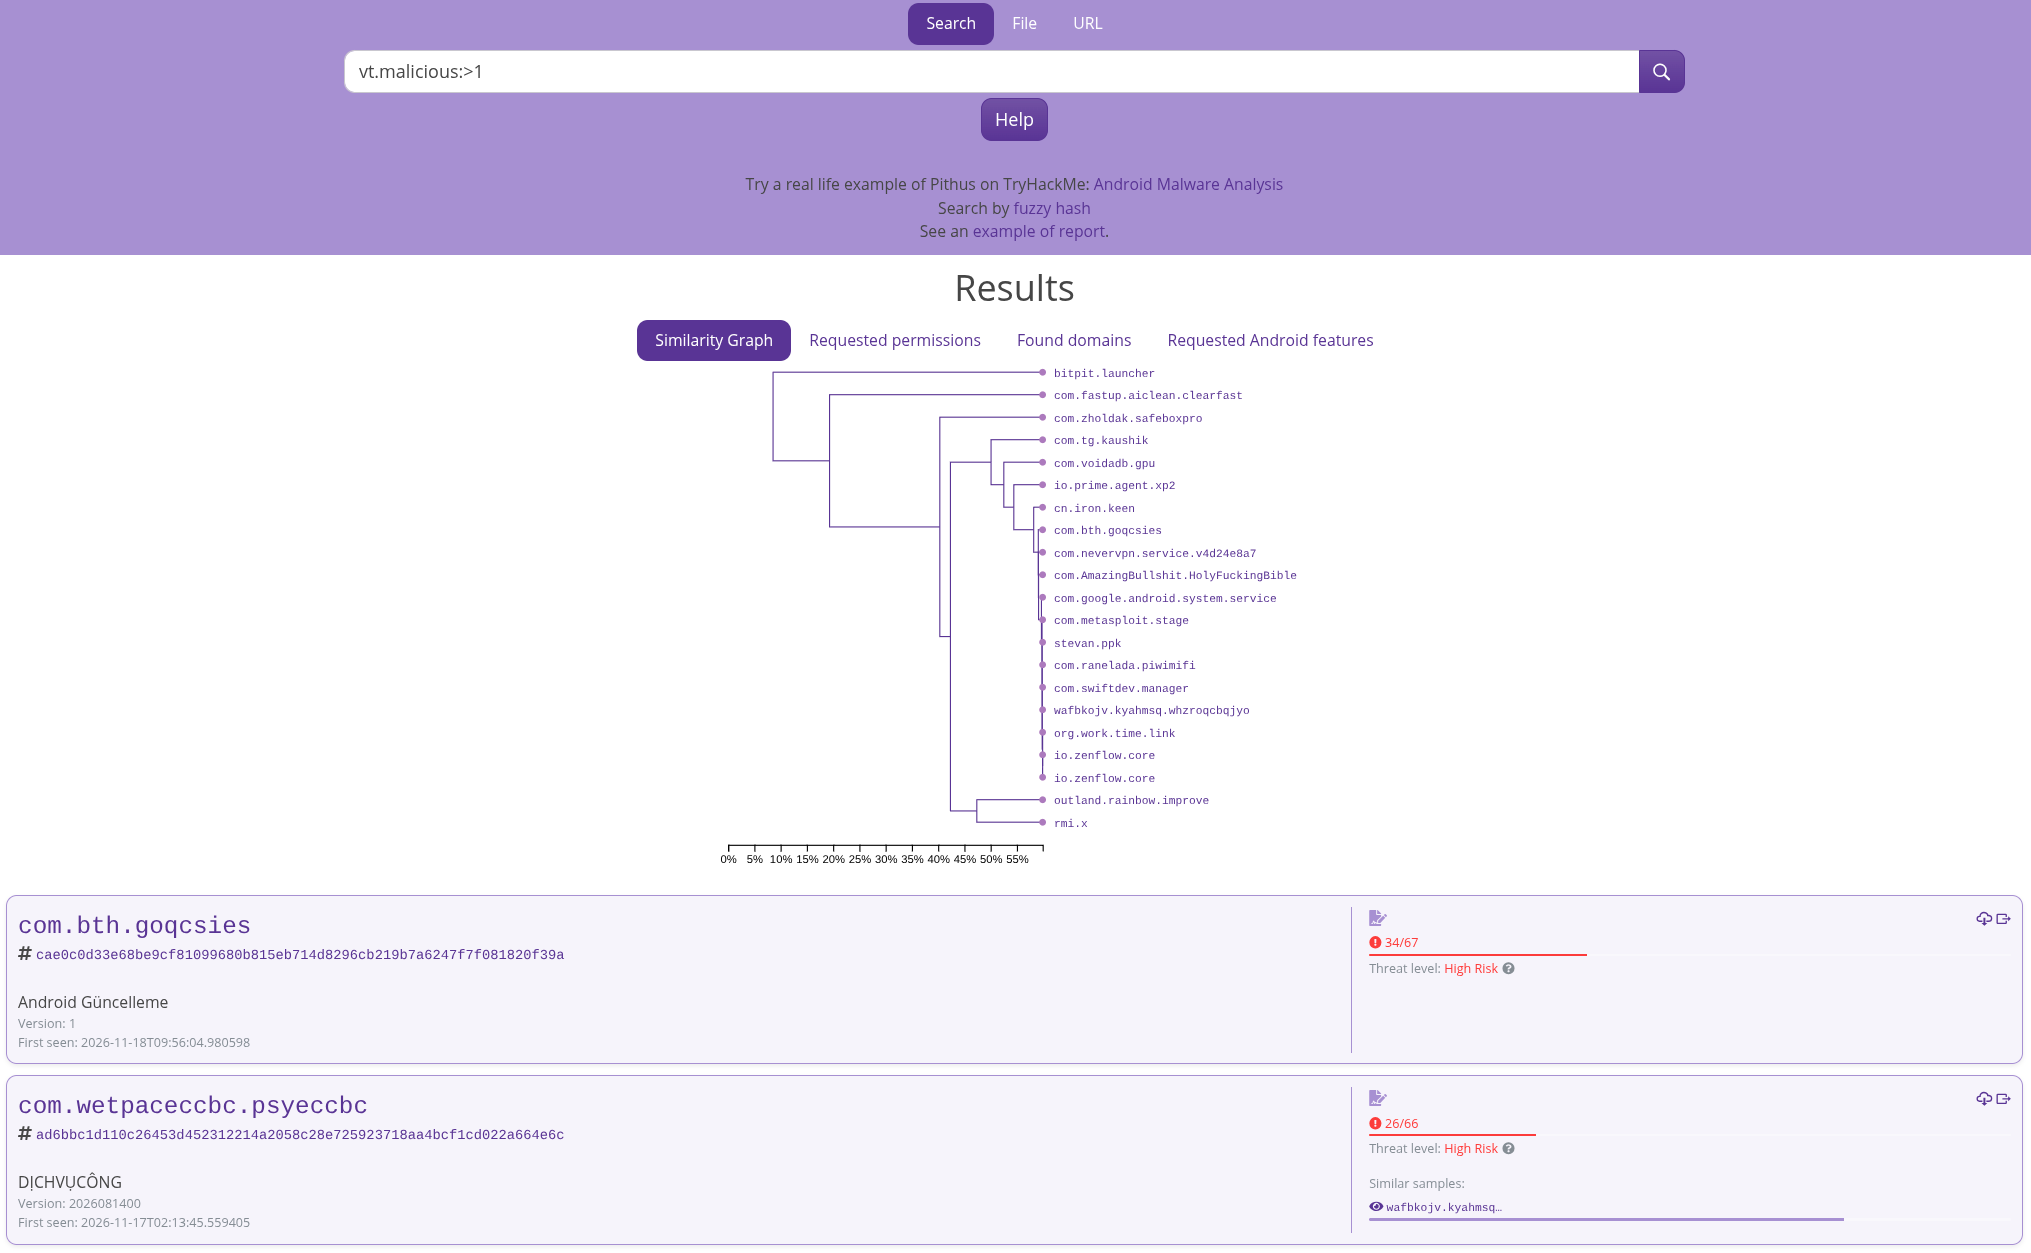
Here we’ve searched for the latests malicious samples. The top part is the similarity graph, showing the relation between each of the matching samples. The closer the horizontal distance between their links, the more similar they are.
Underneath are our actual results, one card per app. Click on the name or the sha256 of a sample to go to their reports.
Upload your APK
Section titled “Upload your APK”Start by clicking the File button, this will change the form to an upload form. There you can select your APK from your computer and click upload to send it to the server. Keep in mind that the public instance caps uploaded files to under 64MB.
In case you need your own instance you can take a look a the local instance setup guide.
Once your sample have been uploaded you will be redirected to the report page. At the top of the page is a status indicator of the analysis:
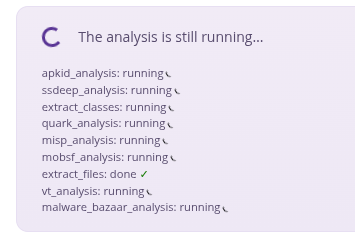
When a step in the analysis is done it is shown with a green checkmark, and a red cross when it failed. A failed step doesn’t mean the whole analysis failed, but some information may be missing from the results.
You can refresh the page at anytime to update the report’s content with the new successful steps results.
Analysis report
Section titled “Analysis report”For the example’s sake let’s use this sample.
Malicious sample
Section titled “Malicious sample”The first thing that catches the eye is the big red Malicious on the top left corner:
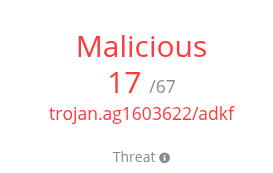
This result, provided by VirusTotal is an instant indicator that the application is a known malware, let’s try to get more informations on this.
Click on the Threat Intel tab and scroll down to find the VirusTotal analysis data. There, we can clearly see the malware’s category as trojan, banker and dropper. Those tags makes us think this malware probably reads some files on the system, or try to access browser information before sending them somewhere on the internet. From there it is easy to pivot to the VirusTotal report by clicking the link, giving us more information about this specific sample.
Find similar malware
Section titled “Find similar malware”Now, notice that right above the VirusTotal results, we have the Similar Sample analysis, where we can already see another sample with a 100% similarity, that’s really high!
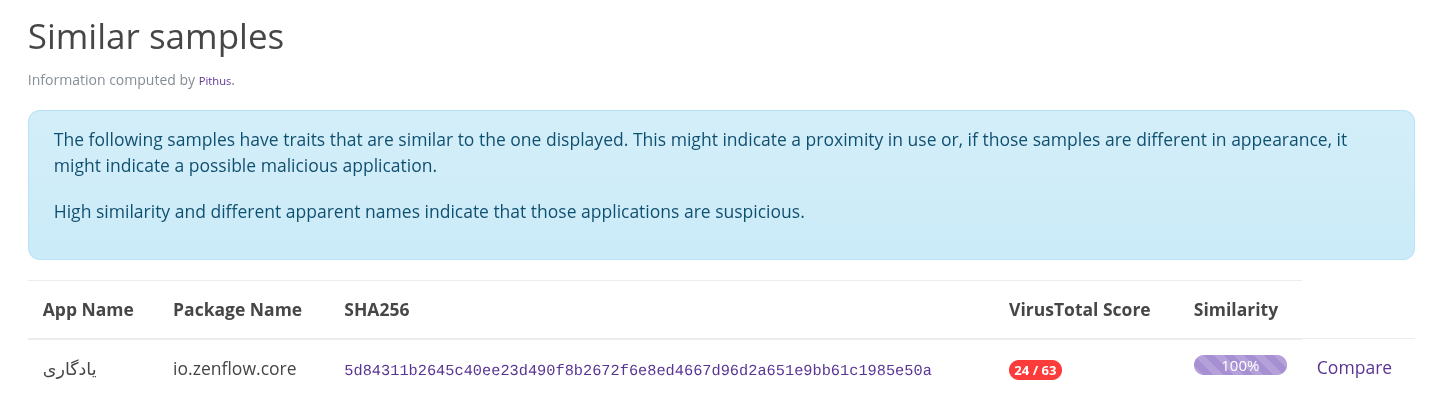
This other sample share the same package name, but having a different sha256 value, it is inherently different. From there, we can click the compare link to the right, and let’s try to identify what are the differences between them. This sends us to the comparison page.
Scrolling down the reports, a lot appear similar, until we reach the Permissions.
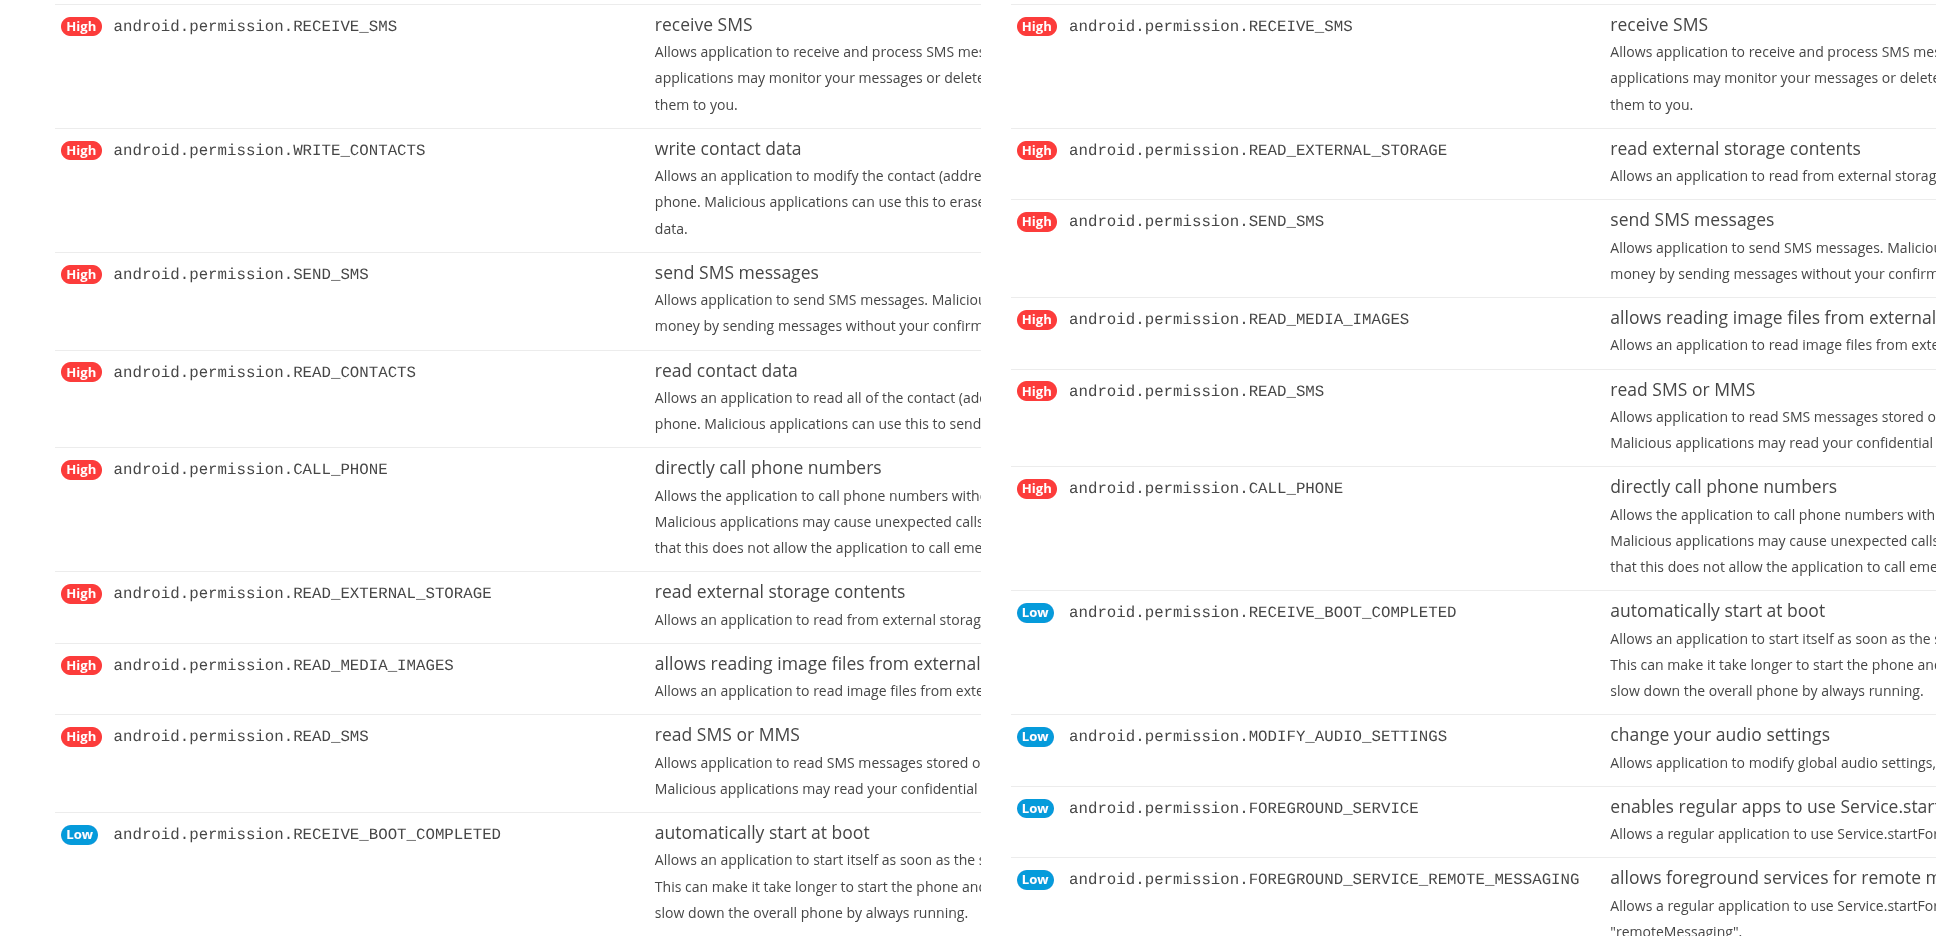
We very quickly identified some differences between them, but this other sample doesn’t give us too many information since it is extremely similar to our first one. Let’s try a different approach.
Pivot on certificate
Section titled “Pivot on certificate”Let’s move to the APK analysis tab, here we can find information about the certificate used to sign the package.
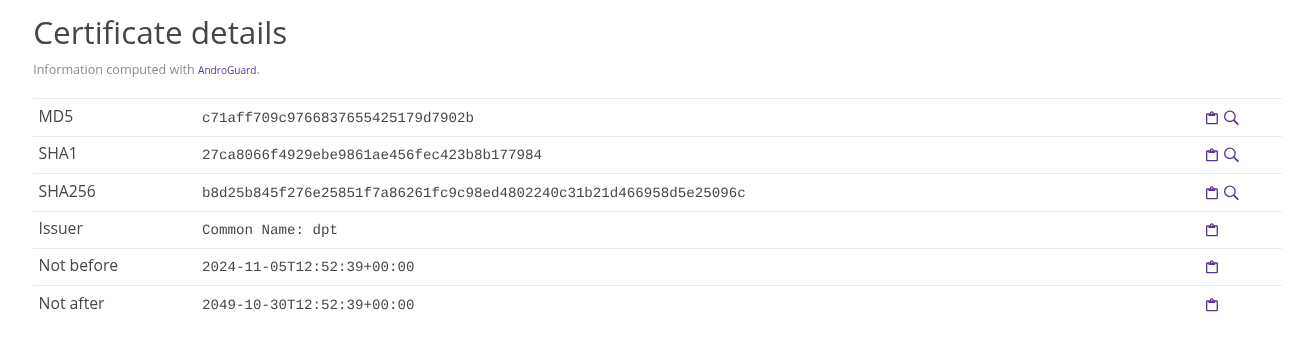
Now, click on the magnifier icon to the right of the certificate’s sha256. This instantly search the database for other sample with matching certificate values, giving several results:
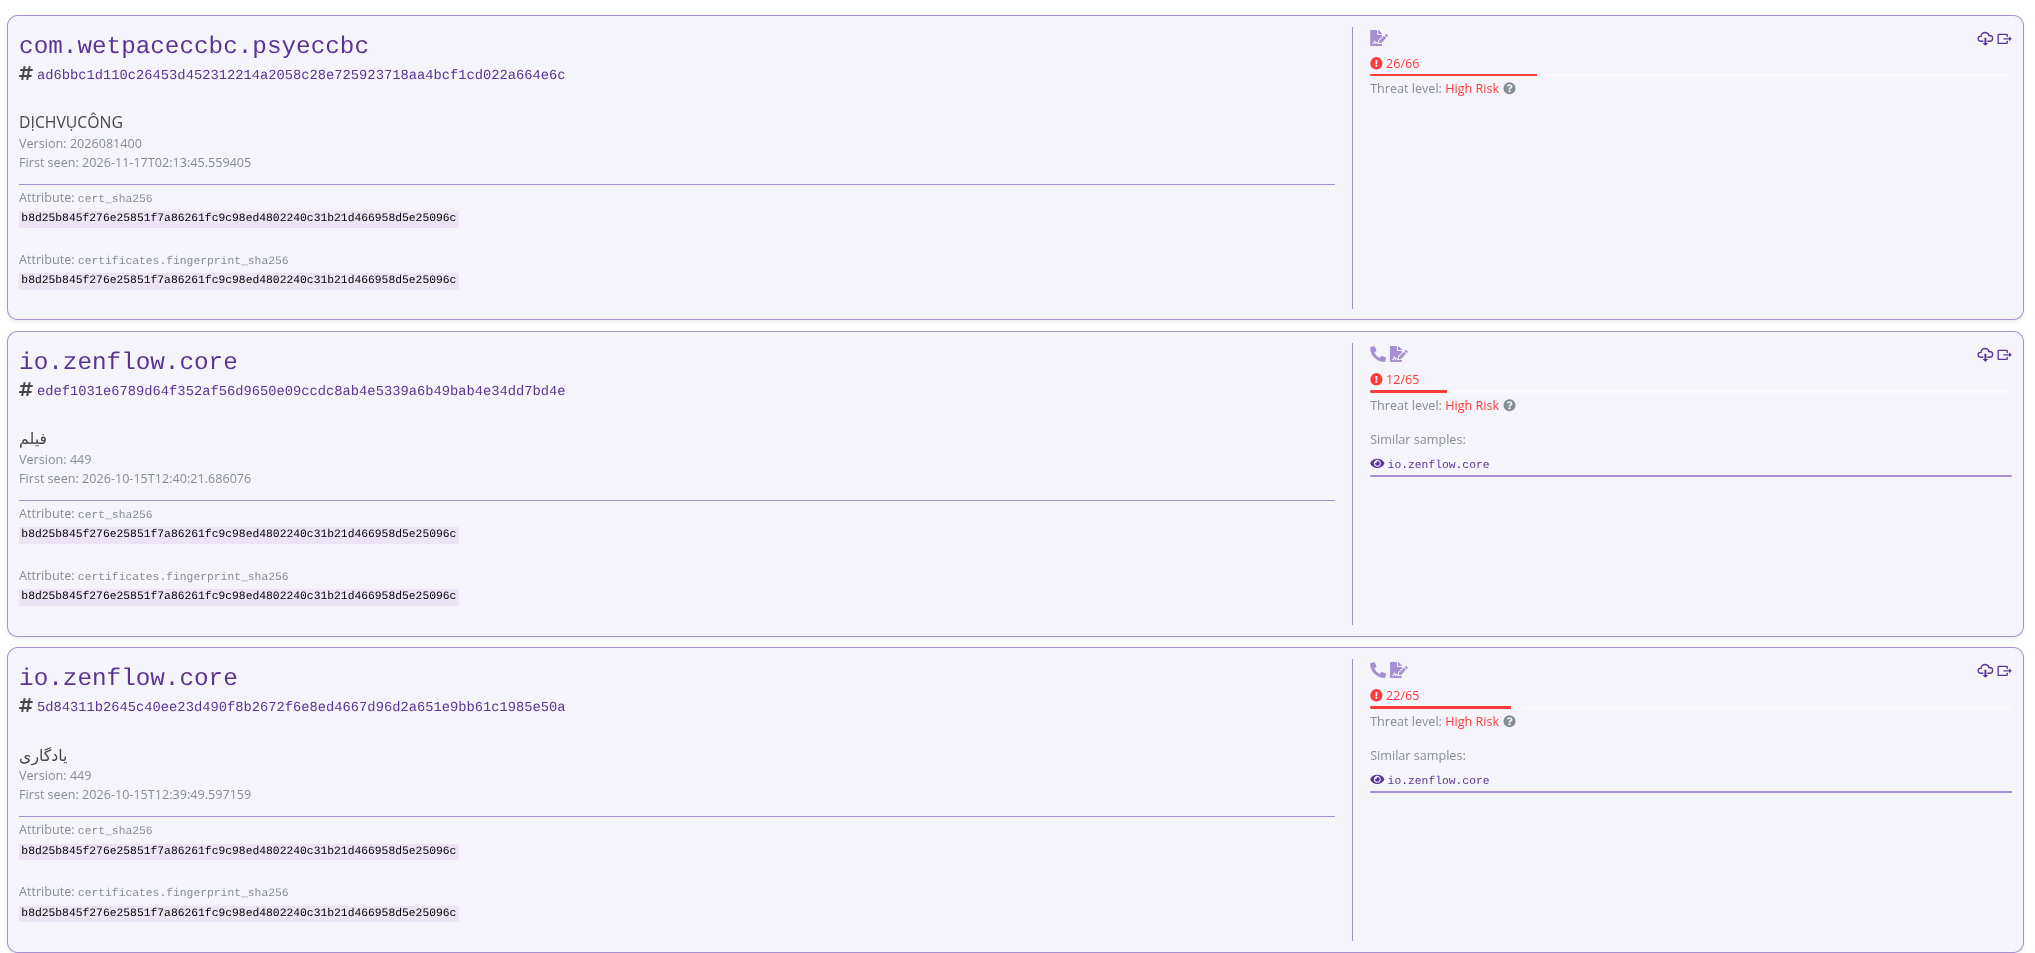
So, the 2 bottom results are the 2 samples we already found, not much to add there. However, the first one we hadn’t seen so far, and interestingly enough, it seems to be a very different APK.
Click on the name or sha256 to open its report.
The fact it has the same signing certificate means it has been created by the same entity. We can safely assume that those 3 samples are heavily related to one another.
There, going back to our Threat Intel tab, we can see virsutotal flags it with the same trojan and banker tags. And we can already see other similar sample that may be future leads. You are free to continue looking around and find more info.
Workspace
Section titled “Workspace”Now if we wanted to not loose those samples, so that we can continue our analysis, we can bookmark them.
Bookmarks
Section titled “Bookmarks”To do that, you will first need to login to the instance, by clicking on the top right login button. Once identified, go back to each reports, and click on the bookmark icon at the top left under the Malicious warning.
Once all 3 have been bookmarked, go to your workspace. And click the Bookmarks tab. There you will find your bookmarked samples
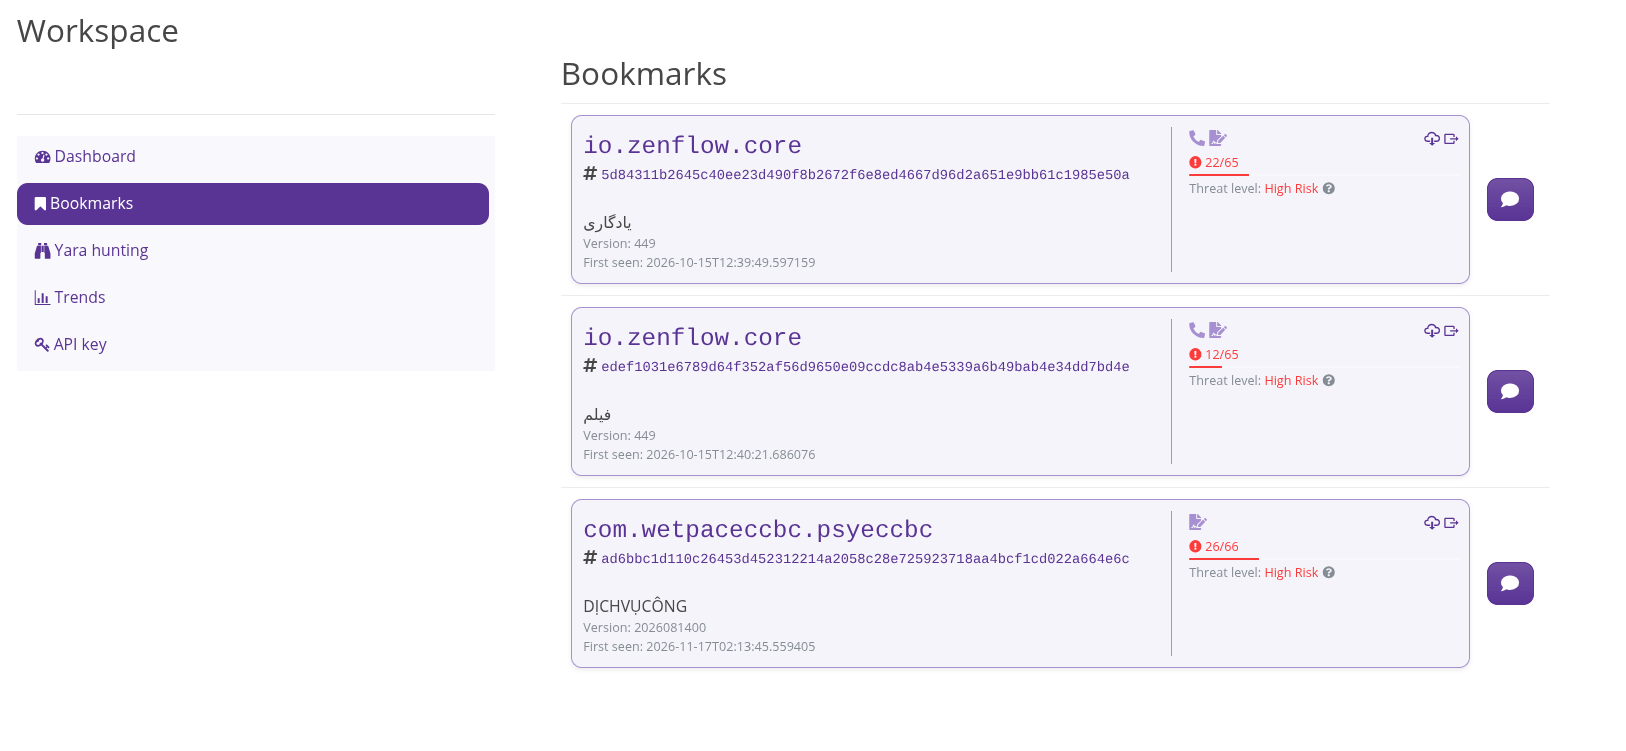
You can add a comment for each of them by clicking the bubble icon on the right if you like.
Yara rules
Section titled “Yara rules”Now, we may want to keep an eye on those sample and detect when new APK signed with that same certificate are being uploaded. This can be done with a custom yara rule. In the workspace, go to the Yara hunting tab and create a new rule.
There, I extracted the public key from the certificate and converted to hex bytes to create the following Yara rule.
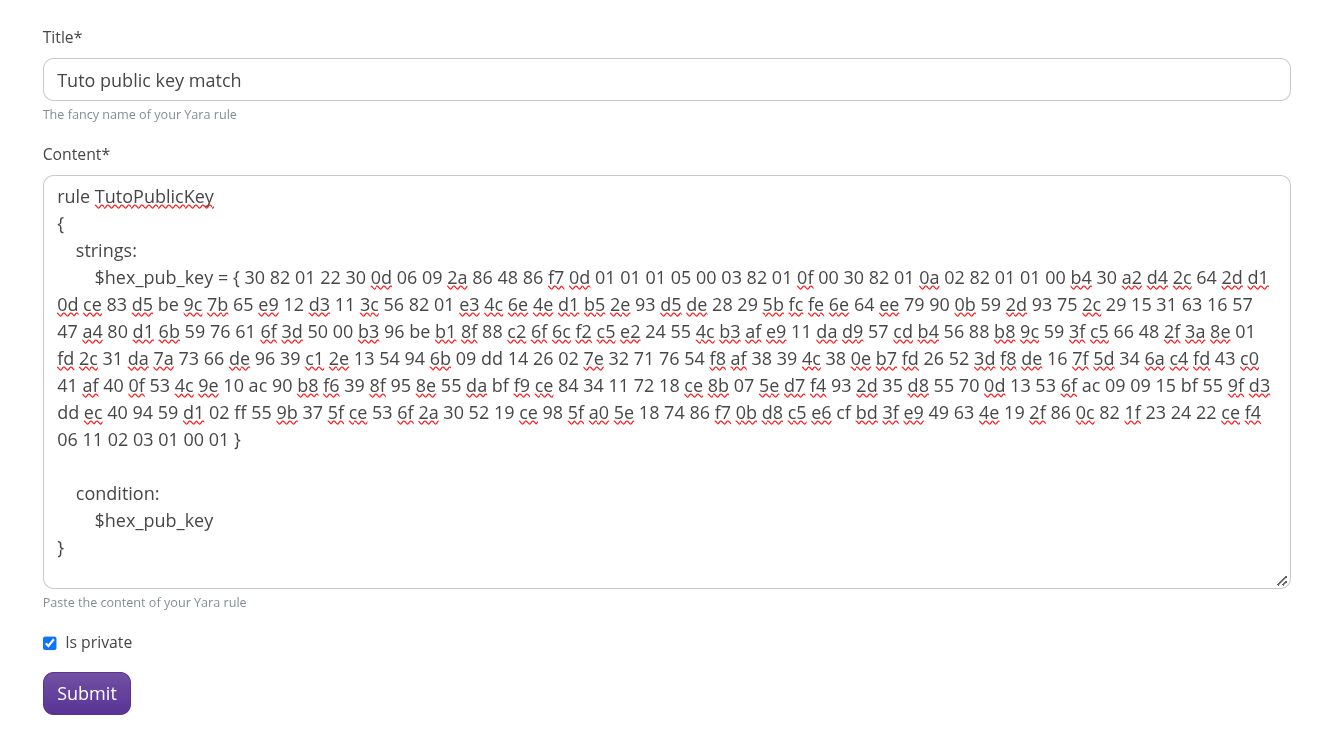
Set to private and submit. Back to the workspace, nothing have been found yet, which is normal because we haven’t launched a retro-hunt.
Retro-hunt allows to run a Yara rule on the instance database to find matching samples. You can launch a retro hunt by clicking the reverse clock icon on the right of your rule. The retro-hunt will run in the background, refresh the page in a moment to view the results, this may take a while.
When it is done running, the number next to the binocular icon will have increased to the number of matches found, click on it to show the matching samples.
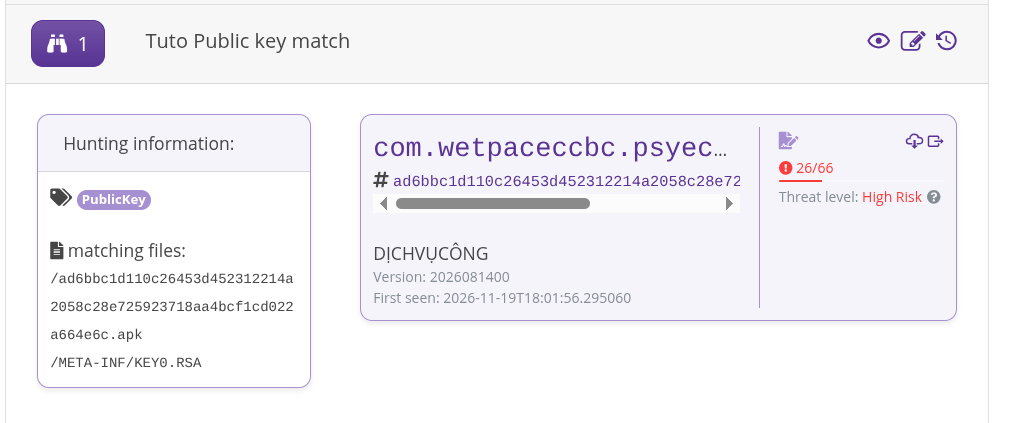
Now, when anyone uploads a new sample signed with the same certificate, we will detect it automatically!
And that concludes this tutorial.